Tracking
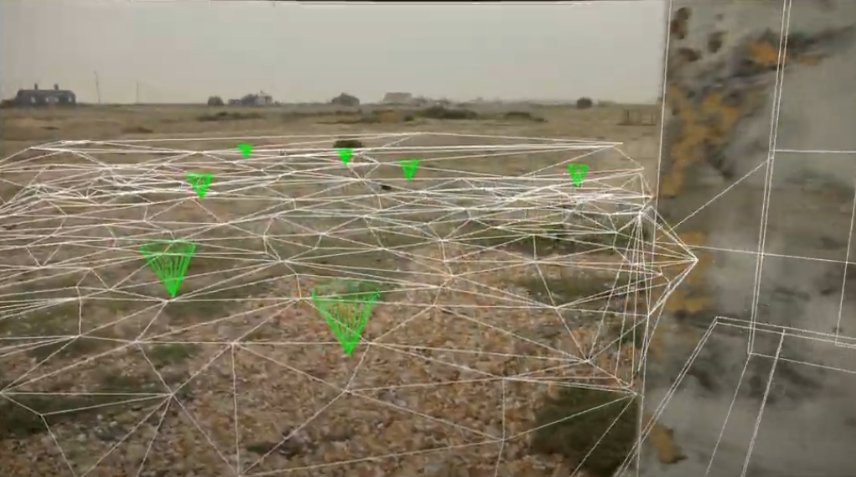
The first thing we had to do was track our 2D plate. We were taught to use 3DEqualiser to manually track the shot. We started on learning how to track tracking points on some practice footage. We would select the marker and click “Gauge Marker” to select the very center of the tracking marker. This means that 3DEqualiser can easily recognise the marker and generate a more reliable track. However this method of tracking would not work with our shots as our shots do not have any tracking markers.
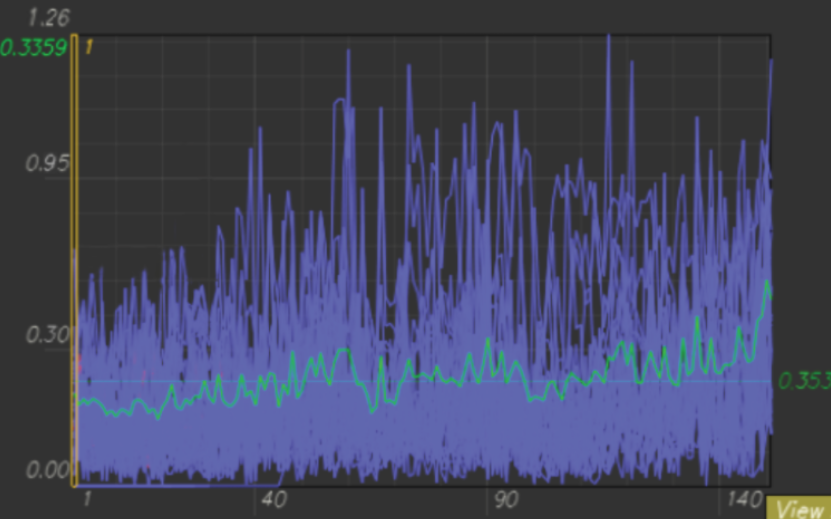
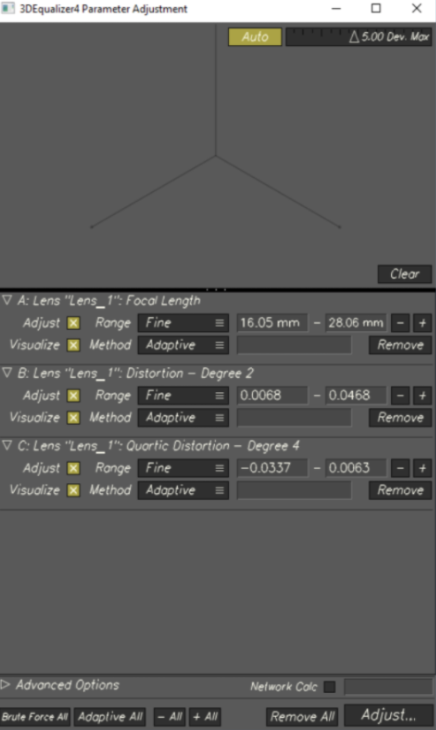
The other type of tracking marker is called a “Pattern Track”. This uses a predetermined pattern and checks for it every frame. For my shot I used 100% pattern tracking markers. For the pattern tracking markers you want to make sure that the scale of each of the boxes are the correct scale. The most inside box is the area that is being tracked. The outside box is where the software looks for the pattern every frame, so it kind of works as a search area. For every frame there must be at least 6 tracking points active. If not, there is a possibility that the track may not be as accurate as it normally would be if you had used more. Another thing to make sure the average pixel deviation is less than 0.4. This makes sure that the track is solid all the way through and that there would be minimal sliding in the 3D software.
In addition to tracking the scene manually, I created an autotrack to add a vast amount of points to my scene. I could then use these points to create a mesh that would be used to add a ground plane to my scene. This will make it easier to align my object with the ground in the shot.
Modelling
I found the modeling relatively simple due to my prior 3D knowledge. I still wanted to push myself when it came to modelling which is why I decided to model a vehicle. I felt that the most challenging part of this model would be trying to make it look beaten up and broken. I modelled the geometry low poly and used Smooth Preview to make my model look good.
I started off with a very low poly block out that gave me correct proportions and helped me visualise the main shape of the model. As always, I started from the front of the car modelling the hood and the bumper. I had not issue modelling the hood of the car as it was a fairly simple shape. However, when it came to the front grille, I started to have some issues. The shape has strong flowing lines that wrap underneath itself. It almost felt as if I was modelling an optical illusion due to the shape of the grille.
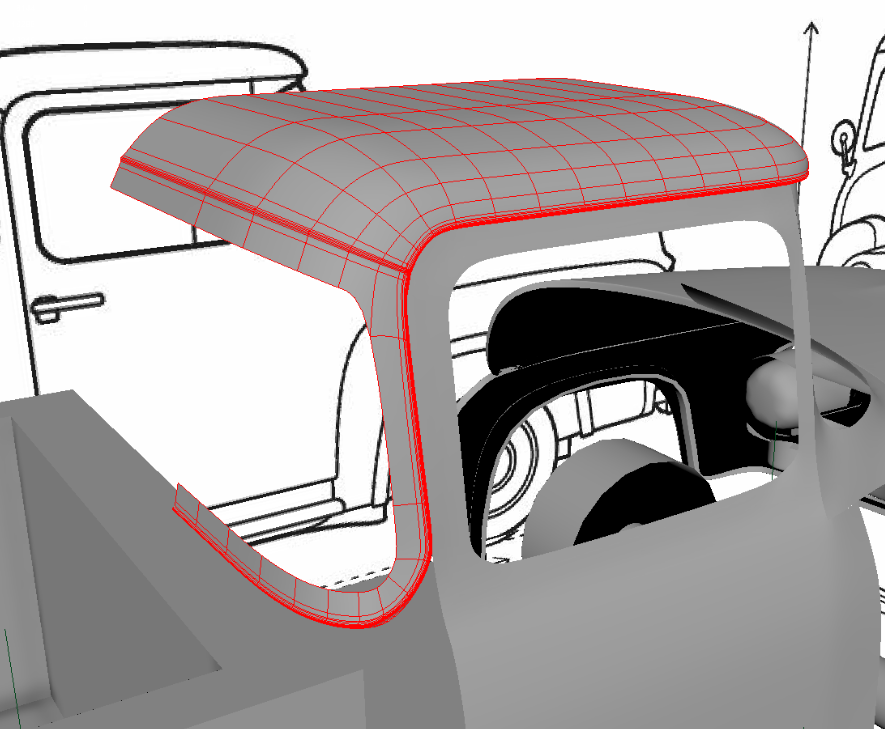
I then moved onto modelling the side fenders which once again was fairly easy due to its very simple shape. I then moved onto the doors which turned out to be quite simple due to it just being a rectangular shape with a window cut out of it. Moving onto the roof is where it started becoming difficult. The roof had a trim piece that followed the shape of the rear window and carried onto the roof. This was difficult because I decided to model it instead of just using a texture. I believe this was the correct way to go about it because the trim sticks out quite far off of the model so textures may look strange even if I used displacement.
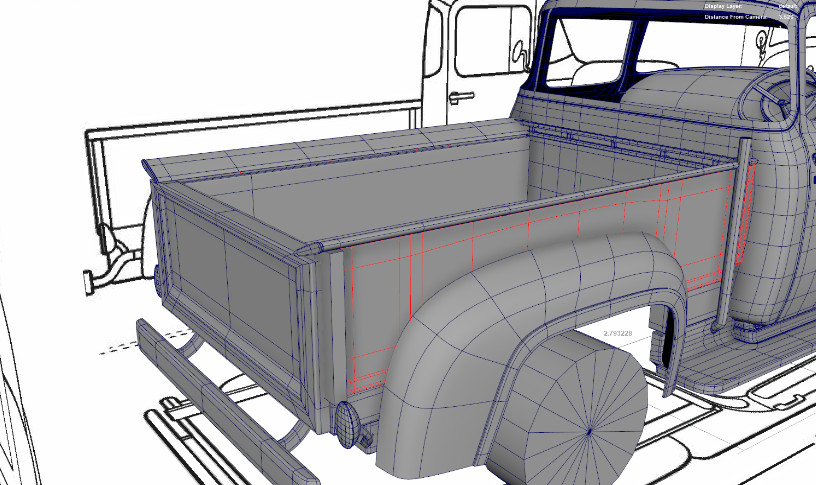
The bed of the truck turned out quite easy as well as it was a very boxy design. I wanted to focus on some of the smaller details of the model, such as the rear tail lights, indicating lights and some bolts that are visible from the exterior of the car. I wanted to model these to match my model to the real thing as much as possible.
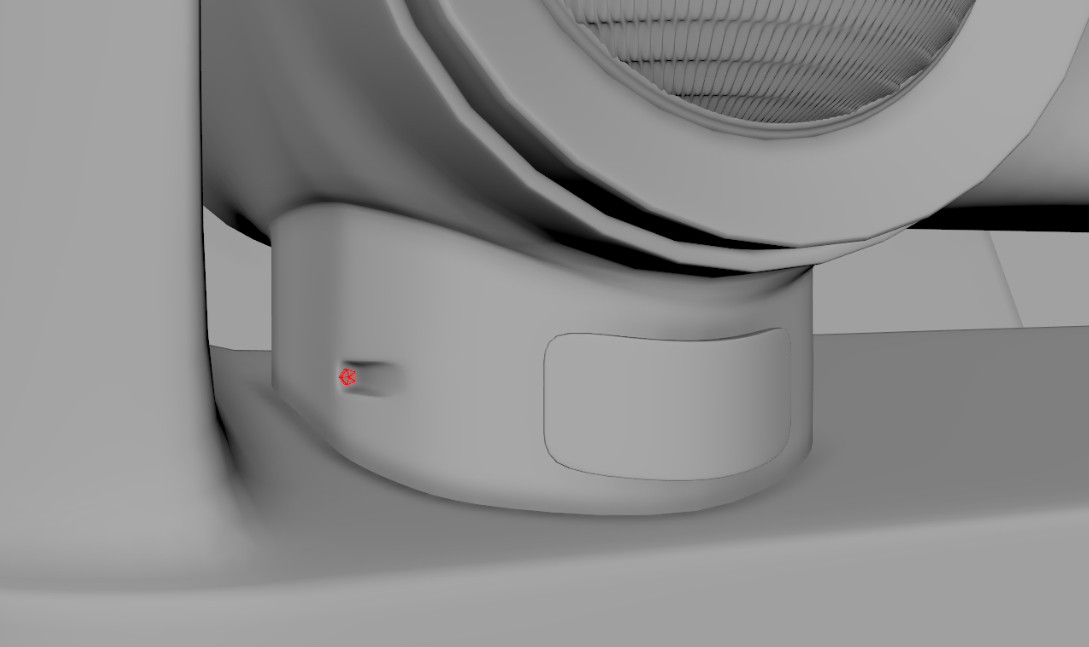
Modeling some of the finer details was pretty simple. I didn’t have to put too much detail in it as it was going to be such a small object. Some of these objects include bolts, windscreen wipers and steering wheel.
Overall, I found the modeling quite interesting as the model was a good blend of organic and geometric shapes. I am happy with my model overall because I feel like I have done a good job modeling a relatively complex object using a small amount of subdivisions. I also think I have done a good job capturing details where details are needed.
UV-ing
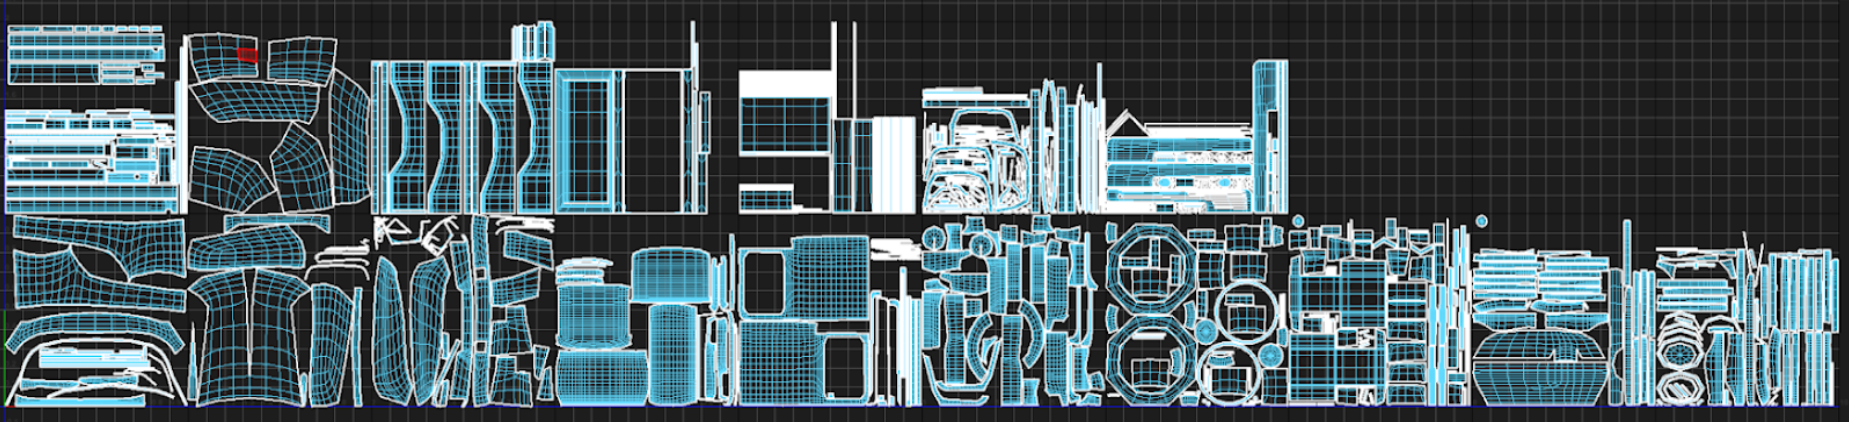
Uving was pretty straightforward. I did my best to try and keep one body panel per UV tile. This meant that I could easily distinguish between the UV’s when it came to texturing. When doing UV’s, I like to use an automatic unwrap as a starting point. From here, I sew all the UV’s together and manually select the edges I would like to cut. Once I’ve cut all the objects, I use the “UV Unfold” tool which opens up the UV’s and tries to remove any distortion. Once I do this, I check if there are any UV’s that are heavily stretched and go back to cut up the geometry a little more.
Another tool that I like to use when doing UV’s is the “Straighten shell” tool. This will make it easier to paint on some curved surfaces when it comes to texturing as it straightens the UV’s instead of them being circular. The last step I take when doing UV’s is to use the Layout UV’s tool. This simply lays out the UV’s to try and optimise them as much as possible. There is also an option in the settings to scale the UV’s so they have a similar texel density to each other. This means that the textures will all have a similar resolution to each other.
I used UDIMS for this project because it allows me to have very large texture files and it makes it much easier to assign textures.
Texturing
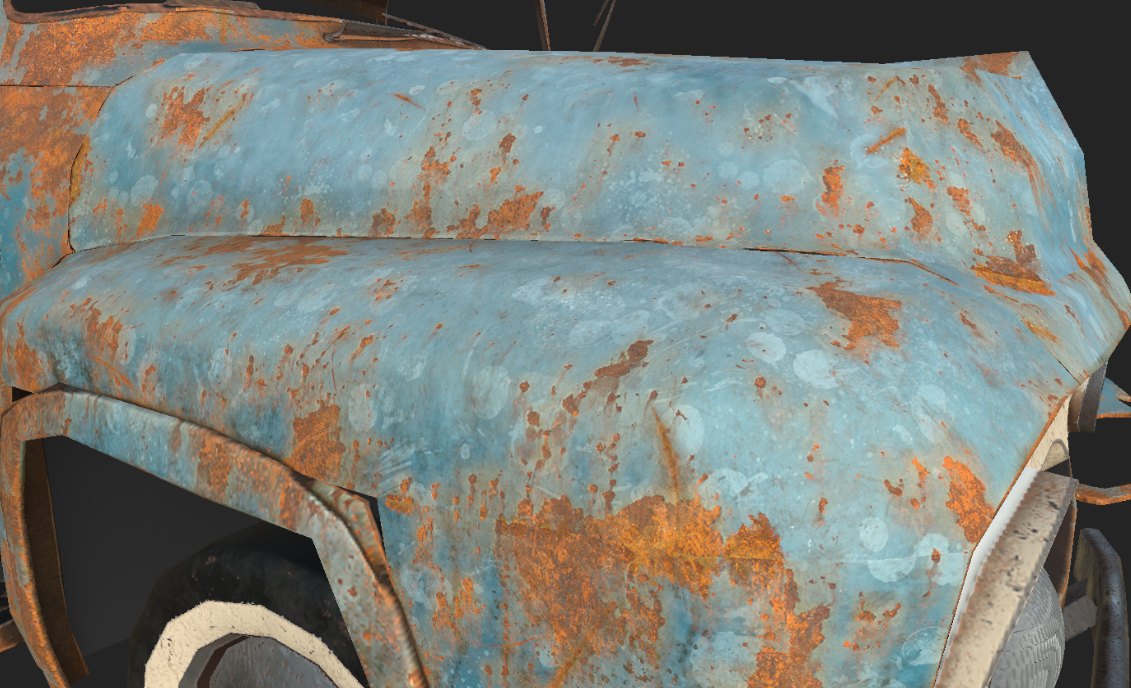
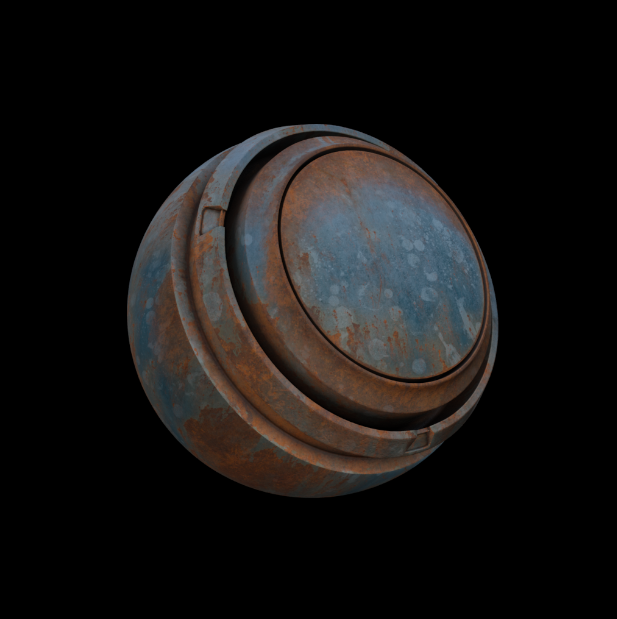
We used Substance Painter for this project. I would say that substance painter is my go to pick when it comes to texturing as it is what I’ve had most experience with. The first textures that I created were for the actual truck paint. I wanted to spend most of my time working on these textures as these were what occupied most of the 3D model. I initially wanted to make the textures act more subtle so I created a washed out blue for the paint and a desaturated red for the rust. I like how the rust looked on the car and how it reacted to the light. However, I received suggestions in my dailies to increase the contrast and increase the saturation to match one of my reference pictures.
I worked really hard to try and match the reference pictures whilst still keeping the textures quite subtle. I felt like I had done a good job with the new textures. I then showed off my work and received more feedback saying that it still looked too saturated so I decided to scrap this material and start working on a completely new material for the body paint. I wanted to steer clear of using preset smart materials so I watched some tutorials on how to use some of the generators in the mask options.
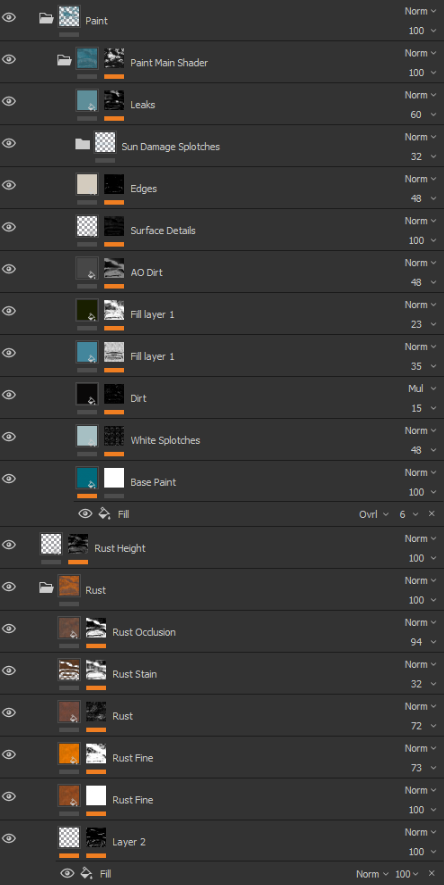
For the new material, I made sure to boost the saturation of the colours and the contrast of the rust. I also added finer details such as some of the rust leaking over the years and creating multiple layers and shades of rust. I really felt like the new material worked better in my shot due to more shades and layering effects.
One of the generators that I used quite alot was the rust drips. This gave me a lot of control on the amount of rust that I had on the material. It also helped me control how much the rust would drip which helped sell the fact that the object has been exposed to the elements over a long period of time.
One thing that I wish I knew more about during this project was linking up masks. This is because I had multiple layers that all used the exact same mask which I would have to manually change the masks to match one by one.
Lighting
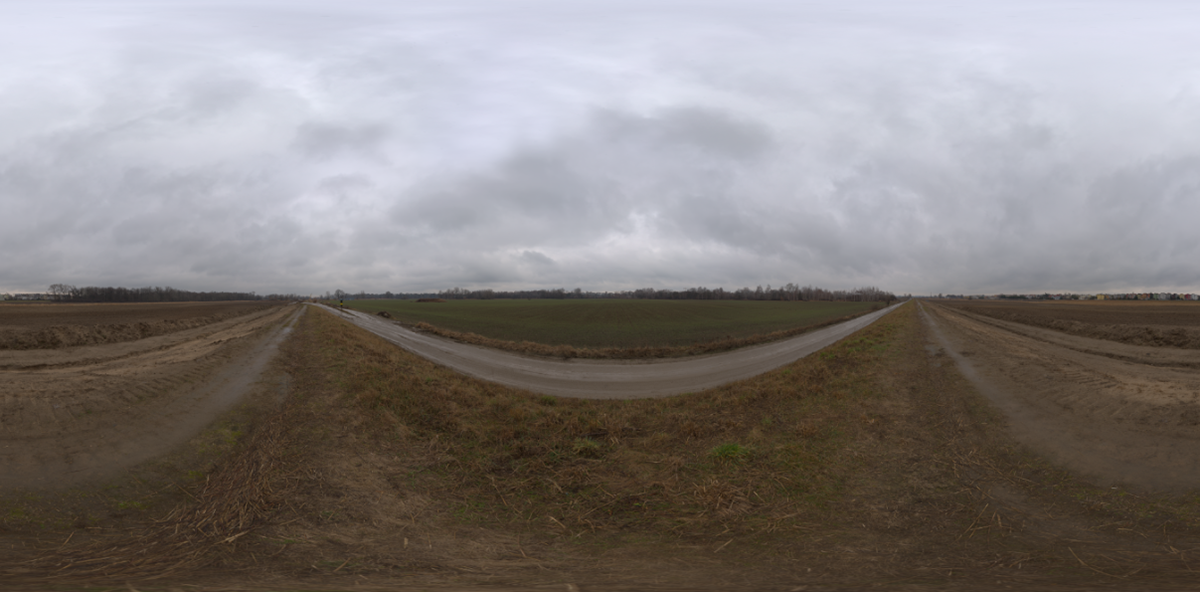
When it came to lighting, I found a very good HDRi early on which had a similar layout to my shot. I decided to download a 4k version of the HDRi to use for preview renders, and then when it came to the final render, I swapped it out for an 8k version of the same HDRi image. This meant that the reflections on the glass would appear sharper and more realistic.
I decided to colour grade the HDRi so the sky matched my shot a little more. The original HDRi was quite blue and saturated. I warmed up the HDRi and re-exported the textures at 4k and 8k size.
Changes and tweaks
I got a lot of feedback from my classmates and Carlos. One of these referred to the original textures that I used. I got feedback that the colours didn't match the reference images and didn't stand out as much as it should do. To fix this I went back to the texturing stages and increased some of the contrast and saturation of the textures. When it came to presenting the work, I received the same feedback that the rust was still quite desaturated and it didn't stand out. I decided to completely recreate the rust material and spent a lot of time making sure it matched my main reference as much as possible.
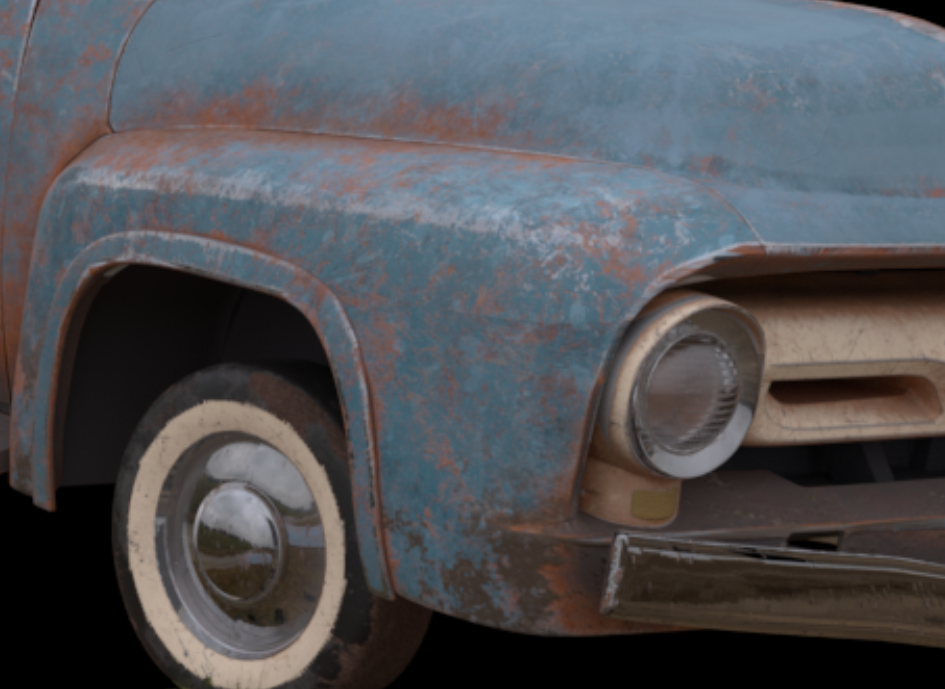
Other tweaks that I worked on to make my scene more interesting was adding some other assets that looked as if they belonged in the shot. One of the largest objects that I added was a wooden pallet in the bed of the truck. I think this works well as it kind of gives a little history to what the truck may have been used for in the past. A few other smaller objects that I added were trash. Such as a mouldy apple, a few empty containers and some flaking rubber details.
Lookdev and rendering
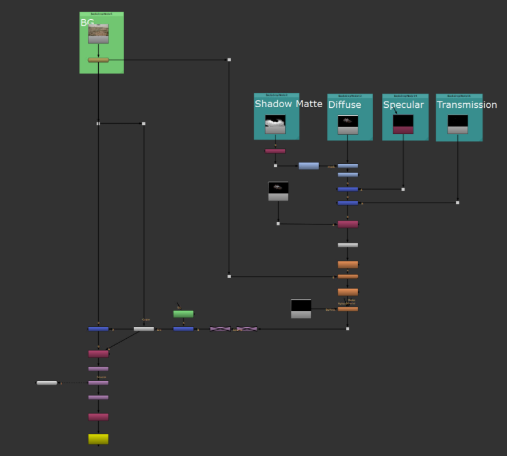
I wanted to focus on making the textures look as good as possible in the shot so I spent a lot of time working on lookdev. I used the hypershade in Maya to tweak the colours of the base colour and I use the aiRange to tweak the values of the Roughness and Metalness. I used this workflow for each of the different UDIM sets to try and make the material look as good as possible.
When it came to rendering it was also quite straightforward as throughout the whole project, I had been slowly manipulating the lighting placement and render settings. This meant that when it was ready to create the final render, there wasn't much to adjust.
Compositing
When doing the compositing I didn’t have that much time to work with. Because of this, I decided to use Klaudia’s Nuke script. This helped me alot because it kind of taught me what the 2D workflow would be like, using all the different AOV’s from Maya. I was surprised with how many different nodes work together to integrate it into the shot. The main things that I found useful for integrating my renders into the shot was using the soften, light wrap and motion blur. This did a good job on making the cg render look less sharp and unnatural. I tried my best to match this artificial blur with the backplate to further improve the integration.